I recently wrote a post about setting up a home office space and how a Brateck monitor arm made a huge difference in ergonomics and productivity. The reason behind buying the arm was to mount a Samsung S24F350F 24″ LED monitor and be able to position it perfectly when seated at the desk.
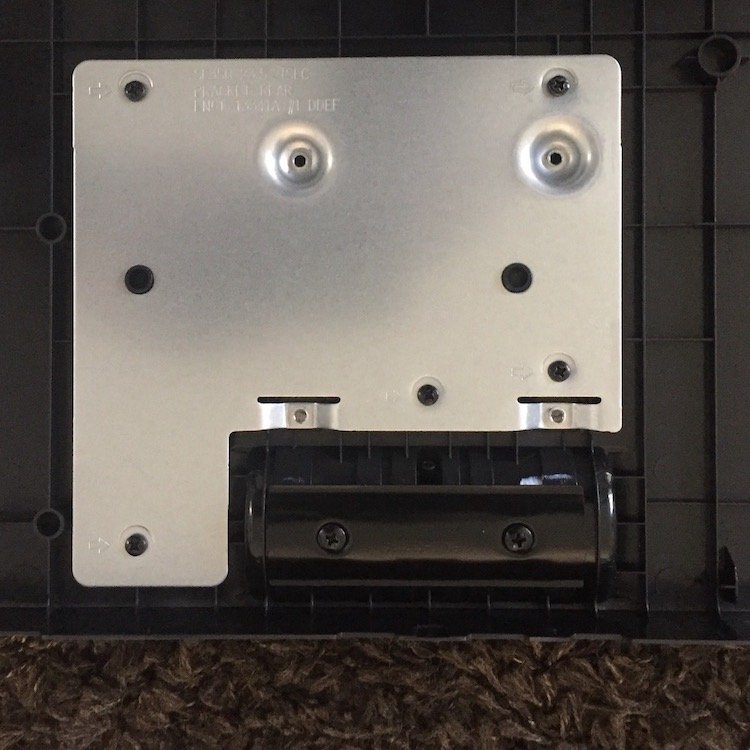
The monitor has 75×75 VESA holes which are located at the bottom of the screen right above the hinge attachment for the stand.
The VESA plate on the Brateck monitor arm comes in a 75×75 and 100×100 configuration. Owing to the 100×100 configuration, the hinge attachment got in the way of the plate sitting flush with the back panel of the monitor. If however, the arm only came with a 75×75 plate, this may not have been an issue.
At this point, I was stuck with a problem of how to remove the hinge attachment.
Removing the Samsung LED monitor stand hinge attachment

After getting over the annoyance and disappointment of not being able to set things up as quickly and easily as hoped, came the task of finding a solution.
Google and YouTube searches returned some interesting results. In one instance, a user cut the hinge off with a power tool. In another, a user left the hinge in place and opted to power file the bottom of the plate until it fitted in place.
With the tools I had at hand, the best option for me was to disassemble the monitor to remove the hinge. To do that, I took the following steps:
- Disconnect all cables and place the monitor (screen side down) on a blanket on the floor
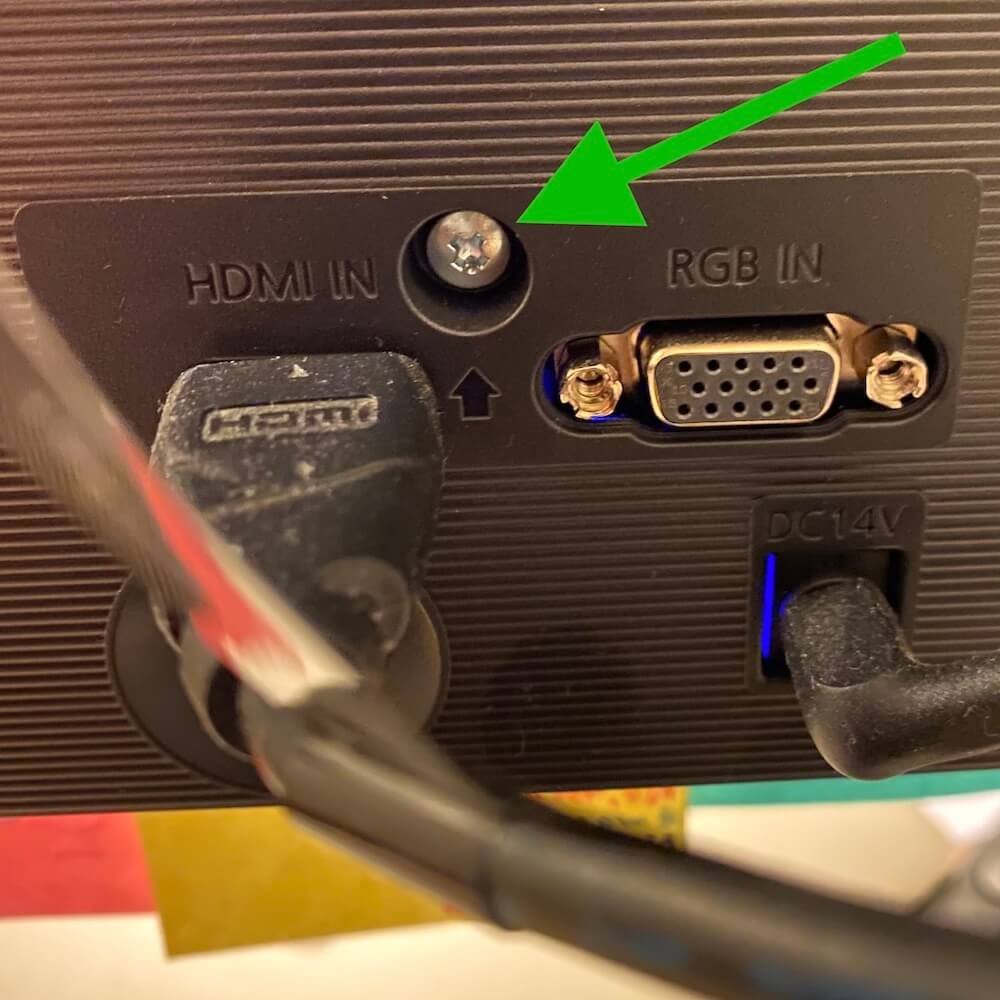
- Update: as per Matt’s comment below, remove the screw near the HDMI outlet on the back of the screen. Unfortunately, Unrealize (comment below) ‘busted’ his screen before realising the screw was there (totally my fault for not updating the post soon enough)
- Pry the back panel off – place a flat head screwdriver into the small inserts on the bottom of the monitor and slowly pry the back panel off. Work along the bottom, sides *and top* until the panel comes off (be very careful to not damage the screen or any of the circuitry).
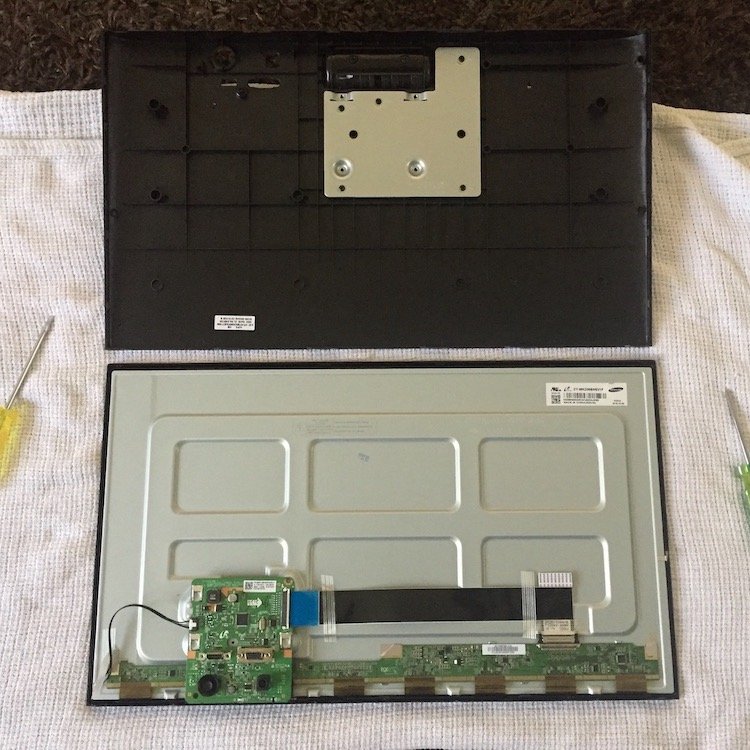
- Remove the hinge – using a Phillips head, unscrew the hinge via the two screws that keep it in place
- Carefully put the back panel back in its position and snap it back into to place by working your way around it
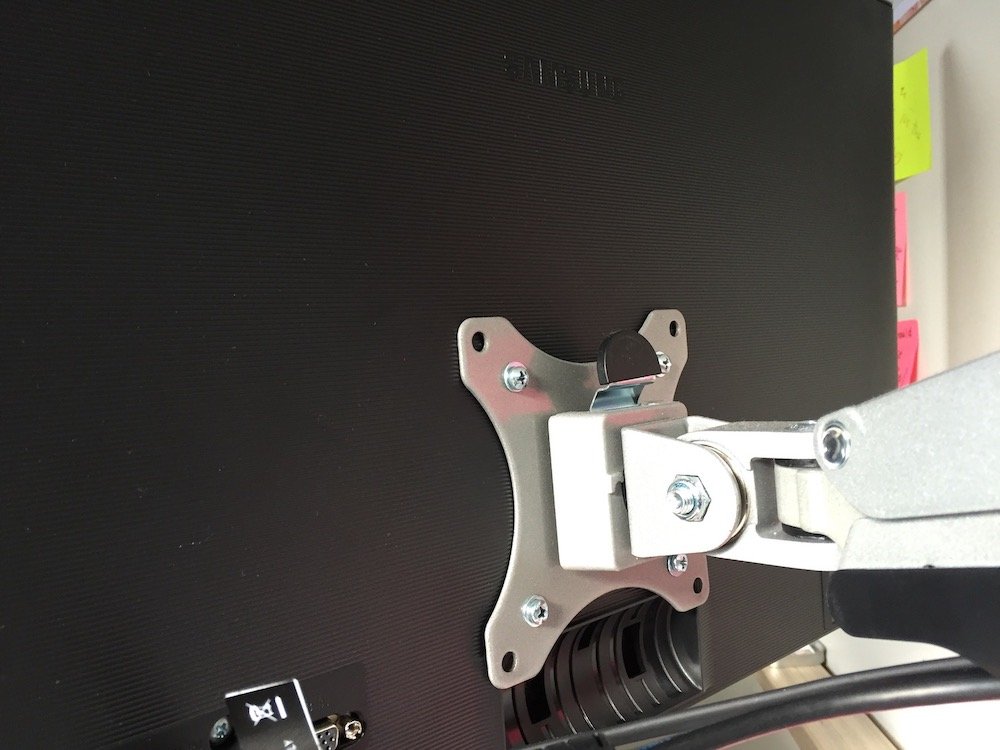
You should now be able to mount your monitor where and how you want.
Using a spudger tool to remove back panel
Removing the hinge was an easy enough thing to do with screwdrivers as mentioned above. But, when prying the back panel off, there was a point where I did hear a small cracking sound. I thought I had damaged the unit but decided the carry on nonetheless. The sound got me slightly panicked as I thought I had damaged the unit but after a quick inspection, I could not see any visible damage.
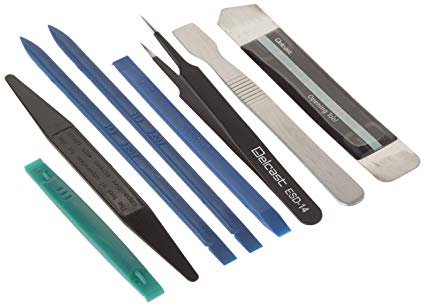
If you don’t want to go through the same experience and want to make sure that you don’t damage your monitor, consider getting a spudger tool kit. You can get one for a very reasonable price on Amazon or eBay.
Hope this helps to get your monitor VESA mountable.
Note: just before publishing, a quick YouTube search returned a video pretty much showing what I did:
cheers for this . What a poor design by Samsung this should be a simple task of not even having to open up the monitor. What where there design team thinking. the screws should have been easily accessible from the outside and a 5 second job.
thanks though for your insight
Hi Phil,
Thanks for stopping by. You are correct in that they did put out a poorly designed hinge. Nonetheless, more often than not, there are workarounds to such issues. I hope you found this post useful.
Hi Gerri! Thanks for sharing!! Was really stuck on what to do with this monitor and understanding how to remove the hinge so we could add the VESA mounting plate. Thanks for taking the time to share this information. It truly was a great help!
Rick
No worries Rick. Glad it helped.
Take care.
Hi Gerri, Just a heads up that The hinge part that attaches to monitor doesn’t have to be removed.
My Vivo V002 desk mount kit came with spacers and the Vesa plate cleared the hinge piece on back of monitor. You won’t notice it when viewed from the front.
Thus way you maintain your warranty and don’t damage your screen taking it apart.
Spacers my friend, spacers!
That’s awesome!
Thanks for the heads up Michael. Very much appreciated.
Take care.
Could have just inverted the monitor and adjust as landscape flipped setting?
Hey Maverick, thanks for stopping by. I’m not sure if that would have worked in this instance.
Hello,
Glad to see somebody succeded at this, the mystery is solved. I just use the extension tubes and long screws which came with my mount so the plate sits a little further away from the Vesa holes without touching the silly stand. Terrible design!
By the way, my one of my monitors, a ls27f350fhexxy, only lasted a year before having lines appear across a third of the screen as of today. Unfortunately I thought it was a good screen a got a second one just before lockdown here in NZ. Goodluck with yours, they are a poor design and poor quality. Up until now I respected the Samsung brand, purchasing their various products (fridge, TV’s, phones, smarthings, hard drives), now I’ll have to reconsider.
Hey John,
Thanks for stopping by and commenting. Next time we are the market for a new screen, we are going to be sure to do our homework so that we don’t have to spend time trying to find a fix for what should be a simple process.
With regards to our screen, so far so good, we haven’t had any performance issues to date.
Take care.
Just wanted to add, some monitor models have a screw that needs to be removed by the display ports, before you can pry off the back panel.
Hey Timothy,
Thanks for sharing that tip. I’m sure it will help some people out.
Take care.
Thanks for getting me started. In addition to the info you provided, I also realized that you need to remove one screw near the HDMI outlet on the back of the screen. If you didn’t do that, I guessing that’s what the “cracking” noise was when you took it off. But thanks again–I wouldn’t even have attempted the screen removal if it wasn’t for you!
Hey Matt,
Thanks for stopping by. I’m glad you found the post useful and that it gave you what you need to attempt the removal. And yes, that screw removal is a must – thanks for pointing that out.
Take care
You should really update your article mentioning that screw. I busted my screen before realizing it was there. (Entirely my fault for not noticing and going too hard on it, but it wouldn’t have happened if I had read that there was a screw). So for some future person reading this, please update the article. 🙂
(My screen still works, but I’ve got a couple dead pixel stripes doing down the screen horizontally. It will still work fine for what I need it too, so it’s all good) 🙂
Oh my gosh! I’m so sorry to hear about that. I feel a bit sh.. for not updating the post and preventing you from busting your screen. I’m updating the article now and hopefully, no one else will have the same thing happen to them.
Hi, it’s the future person replying 😀 I have a s24f352 that needed to have the hinge removed to fit a VESA and with your tutorial I succeeded with zero problems.
Hey future person. Thanks for stopping by. I’m glad it helped. Take care!
thank you so much for posting this. I just received the exact monitor and had the same issue. i was nervous about breaking my new monitor. This worked.
Hey Jesse,
Not a problem at all. Glad it worked out for you.
Take care
Thanks for posting this guide. They looked like a good monitor but I just ended up returning mine. Don’t want to void the warranty.
I’m completely baffled by how stupid the design is, especially coming from a company like Samsung. Makes no sense to me.
Hey Rick,
Thanks for stopping by. You are 100% correct there about the design – definitely could have been better.
My VESA mount came with plastic pads. So, I put the pads under the VESA mount and then it wasn’t colliding with the hinge. workless
Very very helpful. Thanks
No worries Justin!
Glad it helped.
Thanks for this .. What a stupid design! Wanted to wall mount my monitor and was a
so disappointed that it wasn’t a quick couple of screws to remove it. I had noticed the screw by the HDM port so was good to see one simon that it needed removal before dying the back off the monitor.
Thanks for this .. What a stupid design! Wanted to wall mount my monitor and was so disappointed that it wasn’t a quick couple of screws to remove it. I had noticed the screw by the HDM port, so was good to see confirmation that it needed removal before prying the back off the monitor.
Thanks for the info. It was a lifesaver.
Never thought a new Samsung monitor wouldn’t even be as well designed as my 10 year old Dell.
When I got my dual monitor stand I was worried about my Dell and that was as simple as pushing one button to remove the existing stand mount. My Asus and LGs were just as simple. I never expected Samsung to be the odd man out.
Why on earth would anyone design a stand mount that requires removing screws from the inside? They even include wall mounting instructions but I guess the idea of flush mounting wasn’t on their radar or they wouldn’t have put a “permanent” 3″ stand mount on the back?
Be careful for opening monitor, the top border is very narrow (with low quality plastic) and will break very easy! What that happened for mine ☹️
Helpful guide, thank you
Hey Scott, I’m glad you found it helpful. All the best.
Hello Gerri the youtube link is not working any longer.
Hey Yuri, thanks for stopping by. Sorry about that. I will try and search around for another video.
Take care.
Hey, you should update the part that says “Work along the bottom and sides until the panel comes off” to say “Work along the bottom, sides *and top* until the panel comes off”. I only did the bottom and sides thinking I could lift the panel up from there but it just snapped the front frame in half and now I have a damaged monitor I can’t afford to replace.
I thought I could trust this tutorial given that you mentioned already updating it to save people from broken monitors but having read through all the other comments now I see that I’m not the only one that’s had this problem. Really frustrating.
Hi Isaiah,
I’m really sorry that your monitor got damaged. I’ve updated the post as per your suggestion. Hopefully, other people will not have the same problem.
Once again, my deepest apologies.
Take care
Isaiah, I don’t believe you can assign blame to someone if you didn’t see the screw. We are all responsible for our actions, even if someone has created a guide.
Thanks! Exactly what I needed! Easy and quick tutorial.
Hoping someone sees this and can offer some advice. I tried to take off the back panel and damaged a couple of those thin ribbons that connect the board to the screen. Is there any way to a)replace them and b) find where to purchase the replacement parts?
Thanks